Replacing Brake Pads
My front pads wore out right when I hit 20,000 miles. I am easy on brakes even when driving the Elise on the track. I do not apply them over long periods but rather use them hard for a short time. I decided to replace the pads with Ferodo DS2500 pads as mentioned on StopTech's website, the company that made the front brakes for the Elise. (Part numbers FCP1562H front, FCP878H rear) I bought mine from Edwin at RaceShopper.com.
My second choice was the Porterfield R4-S brake pads as offered by Blackwatch Racing.
Read Section JJ of the Lotus Service Notes for the Elise before proceeding.
Safe brakes are critical to safe operation of your car. Do not proceed unless you are confident in your mechanical abilities. I cannot take any responsibility for errors or mistakes you make while servicing your brakes.
Preparation for Installation
Jack up the car being careful to support the car on jacking points B and C. See page 148 in the owner's manual. Do not support the car on point A while working.
As the pads are replaced, hydraulic fluid will be displaced back into the brake fluid reservoir. I removed some fluid to insure no fluid would drip from the reservoir. Brake fluid is corrosive to paint and should not be allowed to drip. Clean it up immediately if it does spill.
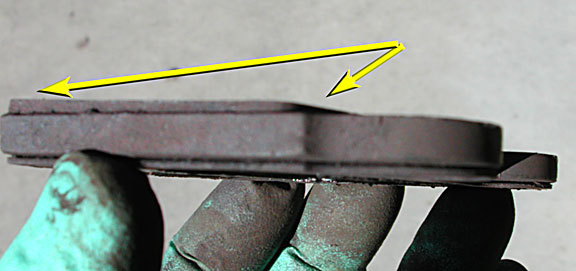
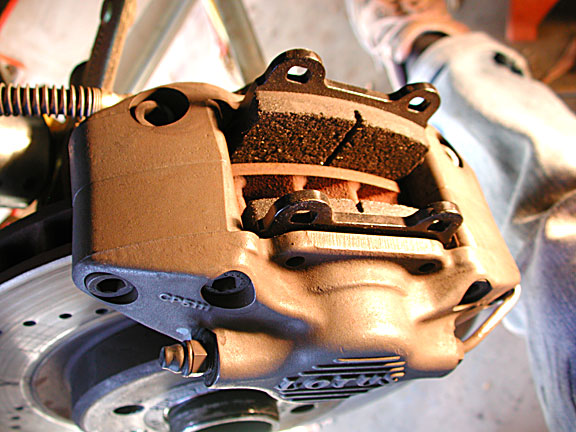
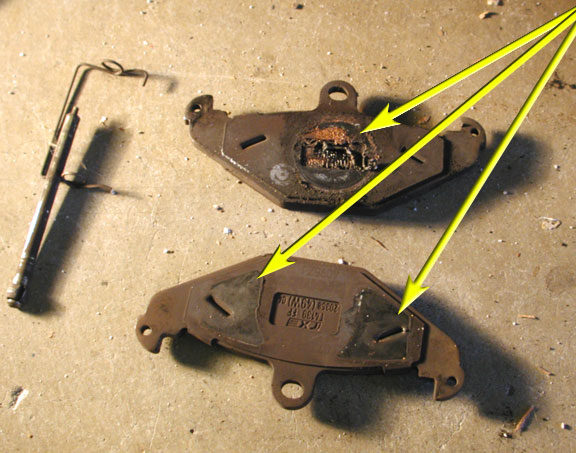
The pads on the Elise do not wear evenly. Check both the inside and the outside pads for wear. The manual suggests the thickness should not be allowed to fall below 2.5mm. Not only do the pads wear unevenly inside and outside, but they also wear unevenly center to outside circumference of the disc. Note the mounting tabs on the right and how the friction material is thicker on the left.
Also note the stock Elise pads do not have the warning fingers that are included on many cars. These fingers rub against the disc before the friction material is gone, giving the driver a audible warning that the pads need to be replaced.
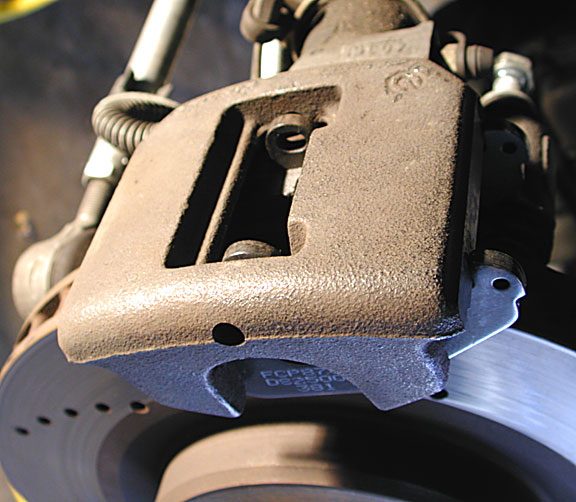
Removing the Old Front Pads
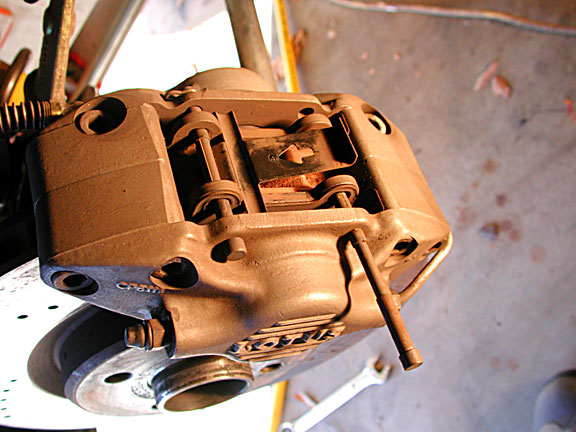
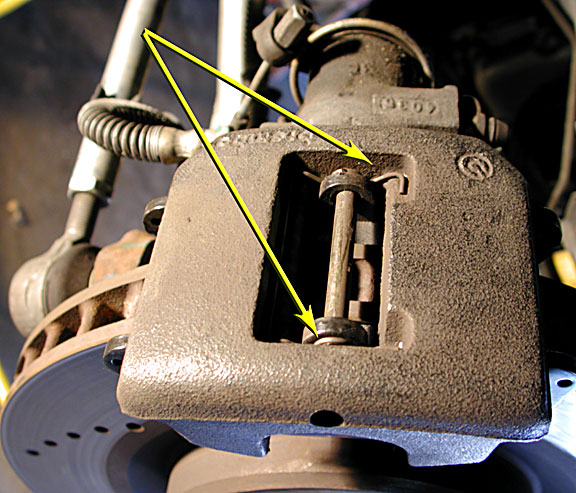
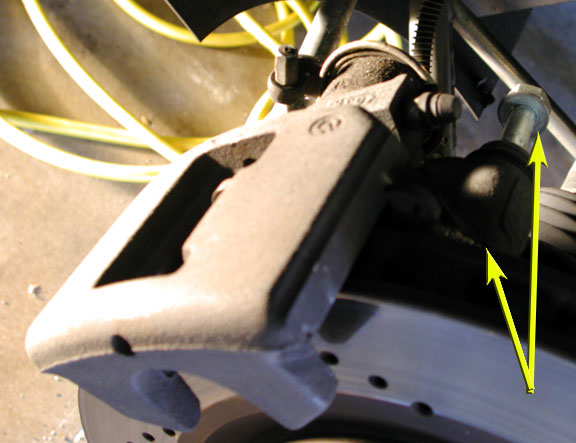
Note the direction of the anti-rattle spring arrow.
The R pins are on the back side of the caliper and are difficult to see. Remove the lower R clip and pull the pad securing pin out.
Depress the anti-rattle spring plate so the ridges on the pin will not catch as the pin is removed.
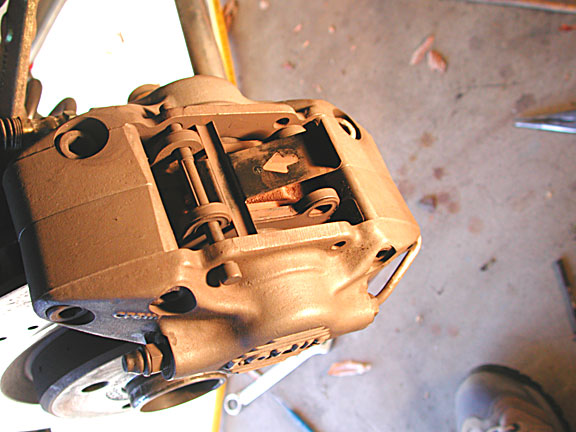
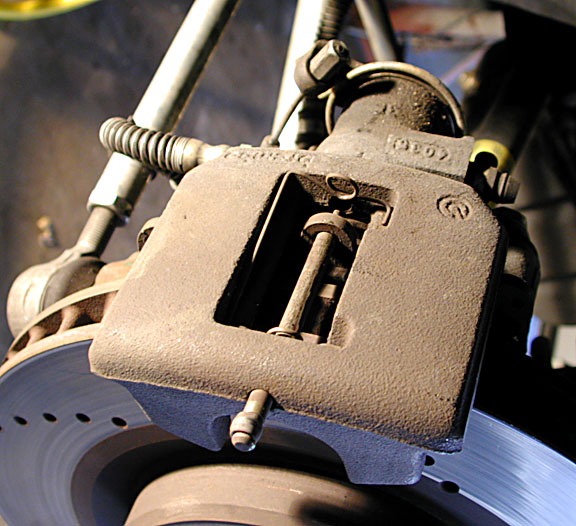
Once the first pin is out, the anti-rattle spring plate can be removed. Tilt it up and it will come free of the top pad securing pin.
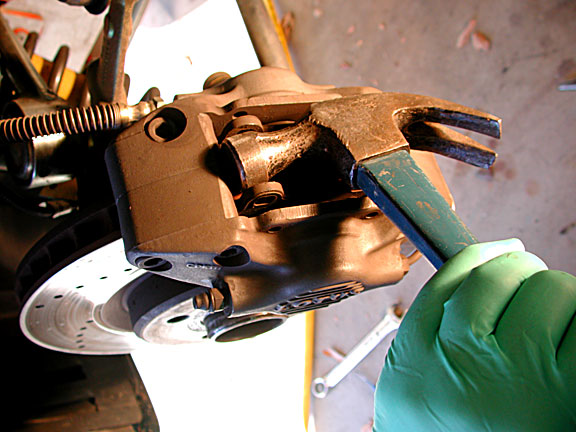
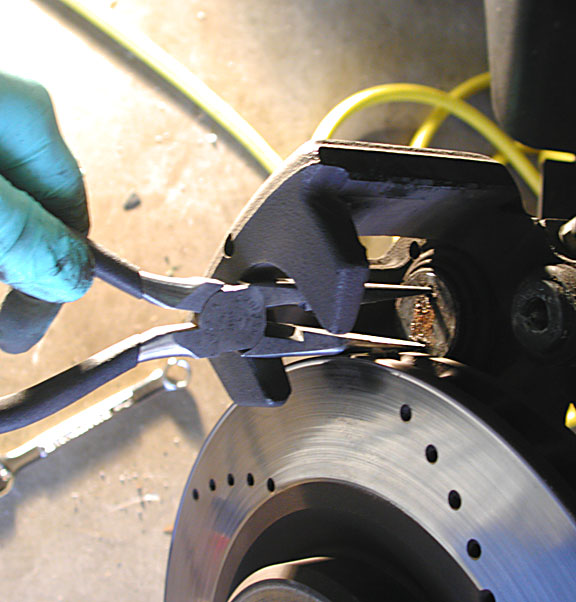
Once you have removed both pins and their retaining R clips, you must pry the two pads apart. They have worn the disc slightly, leaving a small ridge on the outer circumference of the disc. The pads are removed up through the top of the caliper opening and must move over the ridge. Any pry bar will do as long as you are not prying against the caliper casting. The hammer head was perfect as it touches only the tabs of the old pads, one on either side of the disc.
Once separated sufficiently, the pads can be removed through the top of the opening. (See below as the new pads are inserted down through the same opening.)
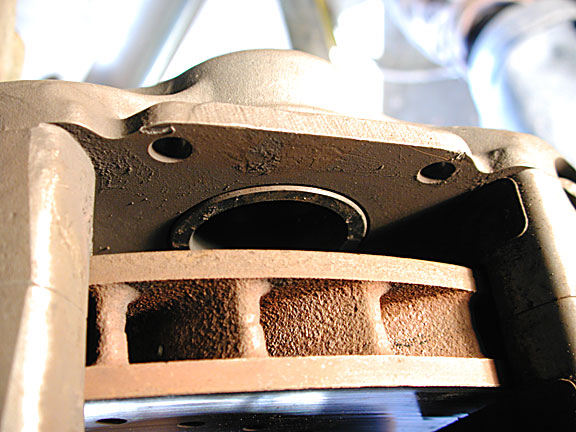
Once the pads have been removed, the two brake pistons need to be pushed back into the caliper to make room for the new, thicker pads. Carefully pry the piston back into the caliper. As you pry on the inside one, shown above, you will probably find the outside one coming out. As you pry the outside one, the inside will come out. You can either alternate or you can pry on both. I used a large closed end wrench, trying to contact the piston at two points. Do not push in the piston unevenly or allow it to cock sideways.
The new pads are being inserted down through the top of the caliper opening.
Push the new pads down sufficiently and then insert the top pad securing pin and the anti-rattle spring. Depress the anti-rattle spring and insert the second pad securing pin. Retain both pins with their R clips.
Replacing the Rear Brake Pads
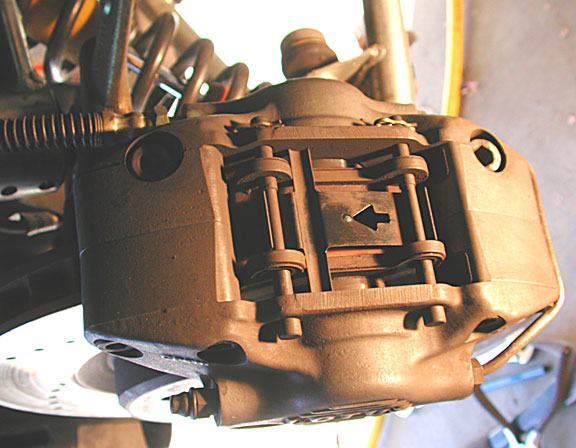
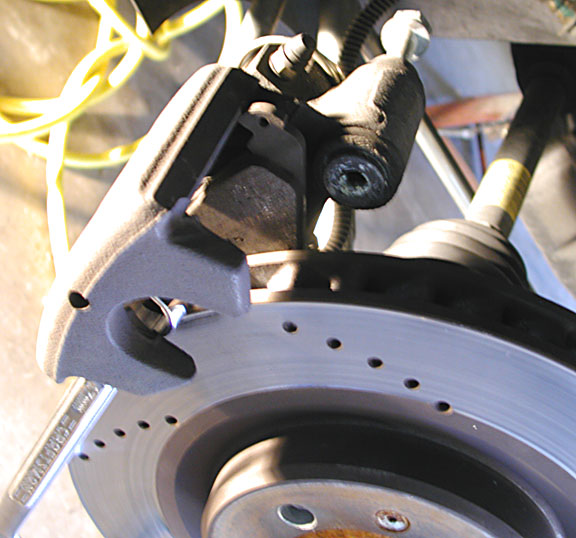
Note the central pin and the single anti-rattle spring. The spring starts at the top right, loops around the pin twice, travels to the near side of the caliper, loops around the pin twice again, and ends in the depression. Note the two arrows.
Remove the pad retaining pin. The pin needs to be pressed out from the inside of the caliper. The hole on the inside is smaller than the hole where the pin is exiting, as shown above. I used a small punch and tapped gently to get the retaining pin snap ring to release. Pull the pin and the anti-rattle spring from the caliper, taking care not to let the spring fly.
The rear pad must be tilted up and back to release the pads. The arrow points the bolt (17mm) that must be removed to allow the caliper to tilt on a rear bolt.
The caliper is rotated up and back, allowing the outside pad to be removed. (The wrench in the picture is there only to hold the caliper up for the picture.)
Once the caliper is tilted, you can remove the outside pad and then push the whole caliper towards the inside. This give additional room so the inside pad can be removed.
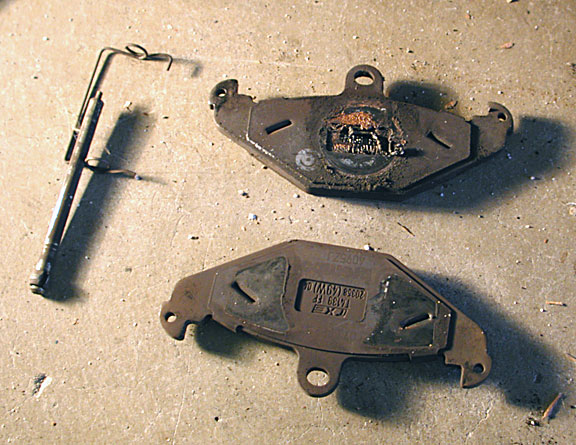
The pads show additional metal that helps prevent squealing. The arrows point to where copper anti-seize is applied with the top pad being on the inside and the bottom on the outside.
The single piston on the rear caliper needs to be depressed into the caliper to allow room for the new, thicker rear pads. The piston needs to be rotated and depressed into the caliper, using a special tool, T000T1242. I used some old needle nose pliers, inserted into the two holes in the piston. Be careful not to nick or pinch the rubber grommet. You must apply pressure on the piston to push it into the caliper as you twist the piston clockwise. It took me about two and a half turns but it can take more depending on how hard you are pushing.
Apply copper anti-seize in same place on the new pads as it existed in the old.
New pad can be inserted. I tilted the caliper up pushed it towards the middle of the car. This provides sufficient room to insert the inside pad. Then the caliper can be pulled away from the middle of the car, seating the inside pad and providing enough clearance to insert the outside pad. There is hardly enough room and some pushing and pulling is required as the caliper is tilted back down over the outside pad.
As you tilt the caliper back into position, make sure to push the caliper towards the middle of the car again, so the forward mounting bolt and its rubber bushing will clear the hub mount. Tighten the caliper mounting bolt.
The rear calipers are similar to those used in the Dodge Viper. However the friction material for the Viper pads is thicker and will not fit on the Elise.
The spring can be pushed into the opening and the pin inserted. The spring will have to be compressed to allow the pin to enter the hole. Drive the retaining pin all the way into the hole, allowing the spring clip to retain the pin.
Bedding in the Brake Pads
First, I took the opportunity to bleed the brake fluid. Brake fluid is hygroscopic and absorbs water. Brake fluid performance is compromised depending on how much water has been absorbed. Brakes will fade and the driver will experience a soft pedal. It is important to periodically replace the brake fluid with new. See this tutorial by Tim Mullen on how to bleed your brakes.
The manufacturing process for brake pads requires a binding agent be used to keep the friction material together. This binding material will get hot, vaporize, and come between the brake pad and the disc. This causes a dramatic loss in braking power. Each manufacturer recommends different methods for bedding the brakes, or vaporizing the binding materials. Follow the manufacturer's directions. Once bedded, the brakes will not have any binding material left and can be used aggressively and safely.
Ferodo recommended 25 to 30 stops, using half competition pressure and of four second duration for each stop. The brakes are then allowed to cool completely and are then ready for use.
Use the brakes and then check to make sure the brake fluid is at the correct level in the reservoir. I fill mine to the MAX level to avoid the brake indicator light coming on. When cornering aggressively, the brake fluid will slosh to one side and allow the brake fluid float to indicate a low condition. Filling the reservoir to the MAX level helps avoid this condition.