
How I removed the rear taillight grilles:
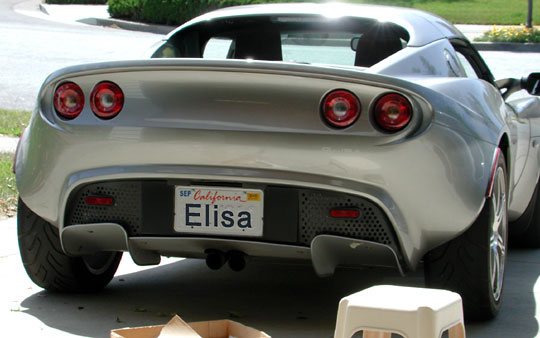
I am removing all the black grille material from my Lotus Elise. I prefer the clean look and aspire to make my car look like Chip Foose might.
This grille removal is not easy. The clam fiberglass will be damaged when the grille is removed. There are some holes beneath the grille that will need to be filled. The work must be accomplished in a small area, making tool access difficult. It is impossible to block sand the filler and achieve a smooth surface that reflects light correctly.
Forming the inside filler really makes you appreciate the efforts of the original clay model makers at Lotus!
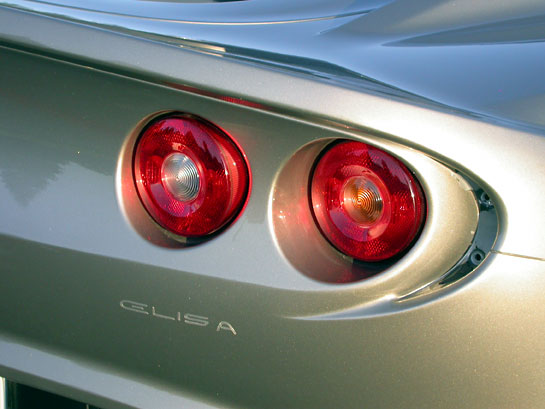
(insert picture of original grille)
The grille is a plastic molding and fits the interior of the body. There is a body seam line that meets the opening on the outside, travels up the opening and meets the seam line just under the lip of the spoiler. The plastic grille is held in with a strong epoxy.
I tried to use floss and heat to remove the grille by sawing the fine thread back and forth under the grille material. The epoxy is too strong and the floss was continually breaking. The heat made the paint delaminate from the glass and I was tring to save as much of the original paint as possible. Finally I just broke out the plastic by pulling it with pliers.
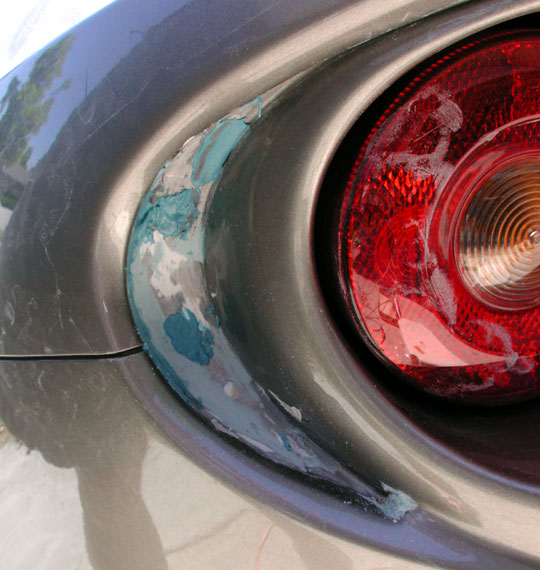
Note the holes and recessed circular areas around them.
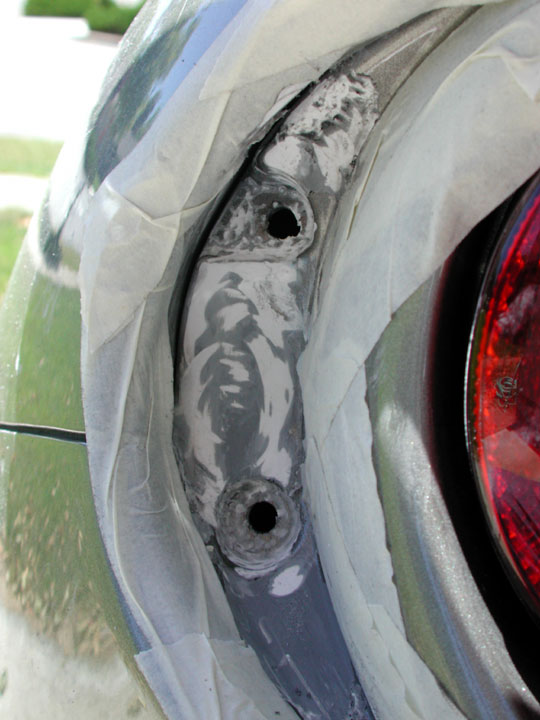
The fiberglass has been roughed up to promote adheasion of the filler material. I have taped the area around the opening in the hopes of preserving the existing paint.
The recessed areas have been filled with Kitty Hair. This is actually a fiberglass resin that has been prefilled with strands of glass. Working in this small area, get the short fibers. It is difficult to remove excess material because of the tight space and lack of access. Following the contour is not critical now.
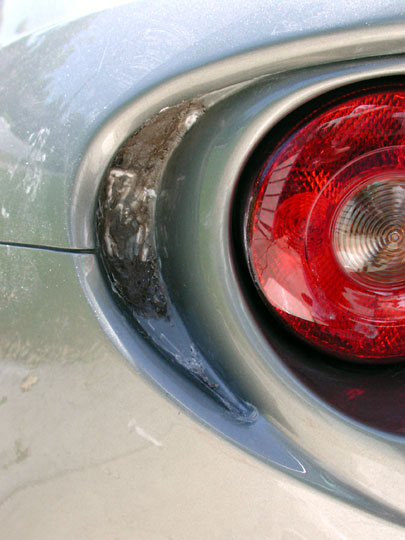
The filler has been sanded and surface putty has been used to fill the low spots and voids. It is now important to establish a smooth contour. I have also filled the seam line from just inside the horizontal line to the left and up to almost the top of the area. How the seam line is finished will be important. It is possible to finish it off just as it turns from horizontal to vertical.
I used a rotary tool with a small drum sander to take off the high points and then used a tiny scrap of sand paper to do the final forming.
Note, it is extemely difficult to establish a smooth contour as it is impossible to block sand in this small area. When the final shiny paint is applied inside this recess, it will show all the imperfections. I will try body paint but may have to revert to flat black to hide my poor sanding skills. I am replacing all the other grille openings with welded stainless steel wire mesh and may have to fill this opening as well, to match.
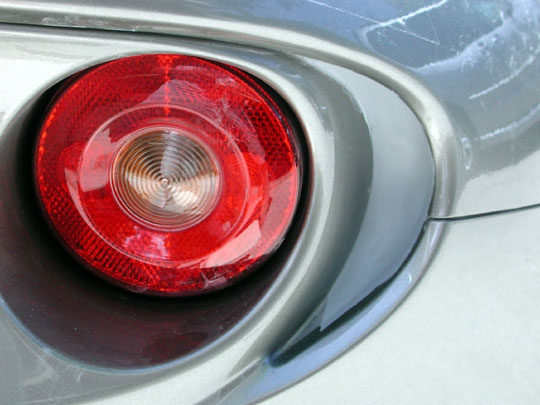
The openings have been sanded and painted with grey primer. I have only primered where there is putty so as to color sand it smooth. Later I will apply the final coat following the crease lines of the opening. Eventually I will repaint the entire car and the paint lines will be sanded smooth.
(finish project, add pictures of final paint or grille)