
Illuminated Dials and How To Replace the Bulbs
Space Clock Models 1202 and 1203
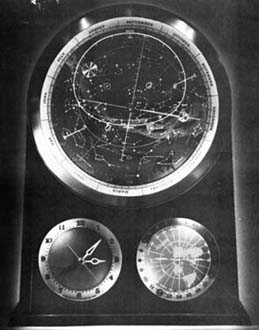
Illumination further emphasizes the beauty of this out standing showpiece. The large Space Dials take on new depth, and celestial beauty. Cool, soft, balanced lighting gives clear visibility to all three dials, at a comfortable reading level.
A simple pushbutton turns the light on or off and is conveniently accessible through the finger hole in the beautifully finished back cover of the Spilhaus Space Clock. The three long-life, lamps are positioned in the internal aluminum backplate as shown on the following page. Each lamp is designed to burn for over 9,000 continuous hours.
Should your clock fail to light after plugging it in and pressing the switch, remove the cherry wood back cover (this is held in by magnets only) and check to see if lamps are in proper alignment. See following page.
Aligning or Replacing Lamps
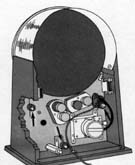
Three lamps are positioned in the aluminum backplate as shown at left. They are properly aligned when the red edge on the back of each lamp is in line with the black lines printed on the aluminum backplate (Figure A below). If the lamps are not in this position, simply rotate the red base to correct.
If the red base of the lamp protrudes more than 1/8" from its orange socket, push it in until it stops. If the lamp stops approx. 1/2" from the
socket (Figure B), rotate the lamp l/ 4 turn (Figure C) and push it in until it stops,? then realign as in Figure A.
Replacing lamps is simple. Remove the old lamp f rom its socket by pulling the red lamp base out from the position shown in Figure A. Insert the new lamp as shown in Figure D. Follow the above procedure for correct alignment.
More pictures of Spilhaus Space Clock and how to repair it.