
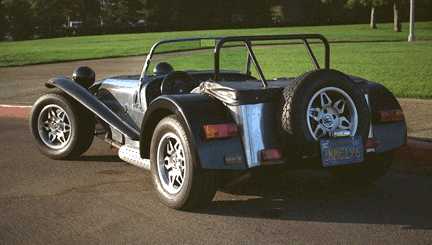
This is the sumary of the original Caterham Super Seven Assembly instructions. I did edit it to remove the measurements and specifications. It really is this simple. You can build your own car.
The Seven delivered from Caterham is a component car, as distinguished from a kit car. All the components are supplied. No fabrication is required. Special tools are not required, but there are a couple that may speed assembly.
The frame, dashboard, electrical wiring, brake lines, and most of the interior are already assembled. The new owner needs to bolt on the fenders, assemble the suspension, and drop in the drive train. Easy!
The manual contains a dimensional (216K) and a cut away (250K) pictures of the Seven.
Assembly Guide - Super Seven
The Super Seven is sold in the U. K. in component form, for assembly by a person who is not engaged in the trade of manufacturing or assembling such motor vehicles. The requirements of National Type Approval do not apply to a vehicle constructed in this way. The car must, however, comply with the Road Traffic Act. It is the responsibility of the purchaser to ensure that the vehicle is roadworthy.
(Early on the kit could not even be sold with instructions because that was considered as selling a complete car. Lotus got around this by having the assembly review by the automotive magazines of the time and these reviews served as assembly guides. mas)
(I think an assumption was made here that the engine and transmission were installed. The kit comes minus these. mas)
Fit radiator and hoses.
- Connect oil pressure pipe to threaded union in cylinder block.
- Connect upper end of speedometer cable to instrument.
- Connect lower end of clutch cable to operating fork. Fit upper end of cable to pedal. Adjust free play.
- Connect and adjust throttle cable and linkage.
- Fit cooling fan assembly.
- Fit nylon crankcase breather pipe to rubber grommet.
- Fit exhaust manifold and gaskets, Y-piece. Neatly trim aperture in body side panel where necessary. Fit silencer. Secure tailpipe with strap and clip, drilling bracket on frame to attach upper end of strap.
- Fit upper front wing stays. Attach wings.
- Fit headlamps, front indicators, repeater flashers.
- Connect - alternator
- temperature sensor
- thermal switch for fan
- earth lead, battery
- starter motor
- Fit fuel filler hose, grommet, and neck.
- Fit carpets.
- Attach handbrake cable to barrel and lever.
- Fit seat belts.
- Fit seats. (This is just drop the upholstered board into the bottom of the chassis. There are no seat tracks or bolts to deal with.)
- Fit wiper arms and blades.
- Fit radiator grille and secure with clips.
- Fit self-adhesive badges. Rectangular badges 2 inches below rear lamps - Caterham Cars on l.h. wing, Super 7 on r.h. wing. (This is the hardest of all and still remains to be done on my car!)
- Fit interior mirror.
- Fill braking system with fluid.
- Fill cooling system.
- Where oil cooler specified, the hose layout should be as shown.
- With the air horns specified, the trumpets should be secured to the heater endplate.
- Fit radiator and hoses.
- Connect oil pressure pipe to threaded union in cylinder block.
- Connect upper end of speedometer cable to instrument.
- Connect lower end of clutch cable to operating fork. Fit upper end of cable to pedal. Adjust free play.
- Connect and adjust throttle cable and linkage.
- Fit cooling fan assembly.
- Fit nylon crankcase breather pipe to rubber grommet.
- Fit exhaust manifold and gaskets, Y-piece. Neatly trim aperture in body side panel where necessary. Fit silencer. Secure tailpipe with strap and clip, drilling bracket on frame to attach upper end of strap.
- Fit upper front wing stays. Attach wings.
- Fit headlamps, front indicators, repeater flashers.
- Connect - alternator
- temperature sensor
- thermal switch for fan
- earth lead, battery
- starter motor
- Fit fuel filler hose, grommet, and neck.
- Fit carpets.
- Attach handbrake cable to barrel and lever.
- Fit seat belts.
- Fit seats. (This is just drop the upholstered board into the bottom of the chassis. There are no seat tracks or bolts to deal with.)
- Fit wiper arms and blades.
- Fit radiator grille and secure with clips.
- Fit self-adhesive badges. Rectangular badges 2 inches below rear lamps - Caterham Cars on l.h. wing, Super 7 on r.h. wing. (This is the hardest of all and still remains to be done on my car!)
- Fit interior mirror.
- Fill braking system with fluid.
- Fill cooling system.
- Where oil cooler specified, the hose layout should be as shown.
- With the air horns specified, the trumpets should be secured to the heater endplate.
(That is it! The factory suggests that this can all be done in 12 hours. The other major function that needs to be done and was not described is the suspension assembly. Most of it is just bolt it all in but the wheel bearing races do need to be press fit into the rotors.)
You too can build your own car. The only problem remaining is getting the kit past the customs officials and finding the right engine. Then you have to get it registered and, depending on what engine you use, get it smogged. Caterham now offers a De Dion rear with disc brakes and the new Vaxhall 2L engine.
Enhancements continue. The car is now available throughout the world.