
How to Refill Your Coolant (first draft)
It is more difficult to change the coolant in a Lotus Elise because the engine is in the middle and the radiator is in the front. Coolant lines run through the frame rails from the back of the car to the front. Worse, the heater is in the passenger compartment and has its own coolant lines. The result is that there high and low points in the coolant path making it difficult to get all of the coolant out. When trying to refill the system with coolant, air pockets are formed at the high points and are difficult to bleed out. Patience is required both when draining the coolant and when refilling it. Happily the coolant change interval is four years. Much like the oil change, it is not absolutely necessary to get all the coolant out. Changing most of it will leave only small amounts of old still in the system.
Please do not attempt this if you do not have the proper equipment and if you are not confident of your abilities I can accept no responsibility if you damage your car or hurt yourself. Working underneath a raised car is dangerous and care must be taken when lifting the car. Please review the oil change description regarding raising the car.
See here on the steps to drain your coolant.
Basic Steps to Refill
- close the block drain
- reconnect the radiator hoses
- remove the right front wheel arch liner
- open the bleed plug, close when coolant shows
- open the heater bleed plug, close when coolant shows
- replace the access panel
- lower the car
- fill the coolant reservoir many times, making sure it always has fluid
- blow air into the reservoir to facilitate the refill process (optional)
- idle the car until the radiator fans turn on and off, twice
- monitor the coolant level until it stabilizes
- replace the wheel liner
Tools and Materials
- replacement coolant, a bit more than two gallons
- Allen head wrench (remove access panel)
- 8mm hex head socket (remove access panel and hose clamps) (I think size is right, at front)
- 10mm hex head socket (remove access panel)
- 12mm hex head socket (remove access panel) (I think size is right, for two center support bolts at rear)
- wheel blocks (any wood pieces)
- automobile jack
- two jack stands (not essential but recommended)
- torque wrench (not essential but recommended)
- funnel
- drain pans, three is helpful
Coolant Flow Diagrams
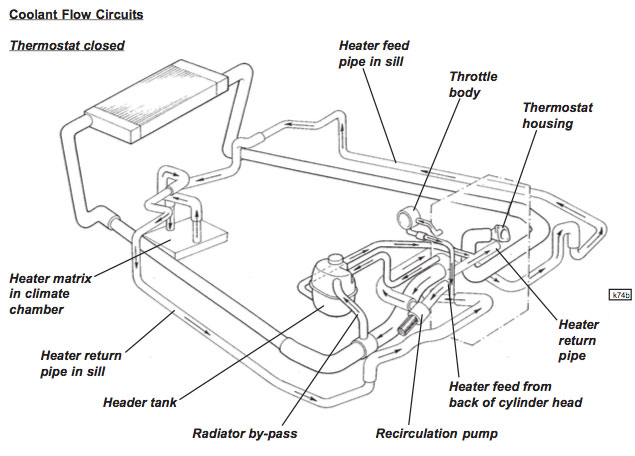
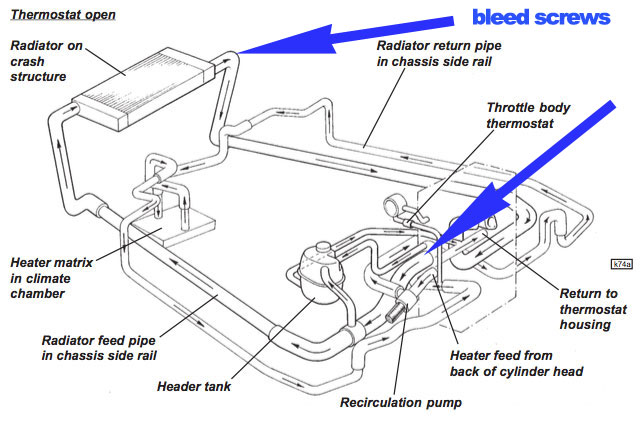
Notice how the coolant pipes and hoses go up and down. When draining, coolant will puddle in the low sections and not drain. When refilling, air bubbles will remain in the high sections and coolant will not completely fill the system. Also notice how some coolant paths are not used until the engine reaches a certain temperature and the thermostat opens. Your challenge will be to do all the things you can to complete the refill process, getting all the air bubbles out.
The blue arrows show the location of the front and back bleed screws.
Total capacity is 12 liters of coolant. Recommended coolant is Havoline XLC, which is difficult to find. Do a search at LotusTalk.com to see what some possible alternatives are. I used Peak Global Lifetime.
Please refer to the oil change reference page on how to lift the front and rear of the car safely.
Instructions from the Manual
Instructions from the Lotus Manual on refilling the coolant system, section KH 3.
To refill the system:
- Refit the hoses to the feed and return pipes and close the cylinder block drain tap.
- Remove the right hand front wheelarch liner and open the air bleed plug on the radiator outlet hose. From within the engine bay, open the air bleed plug in the heater return hose at the left hand rear of the engine bay.
- Fill with the recommended coolant mix via the header tank and close the bleed plugs when a steady stream of coolant is expelled.
- Start the engine and allow to idle, and periodically open the bleed plugs to allow any trapped air to be expunged. Top up the header tank when necessary, and fit the pressure cap when required to prevent overflow. When the cooling fans have cut in and then out, stop the engine and allow to cool. Recheck coolant level when fully cold.
Refilling the Coolant
There is some question as to the attitude of the car when first starting to refill the coolant system. I started with the front in the air so I could access the front bleed screw. I suspect it really does not matter.
Replace the front radiator hoses, left and right. Refit the access panel.

Close the block drain by turning the hex bolt closed.
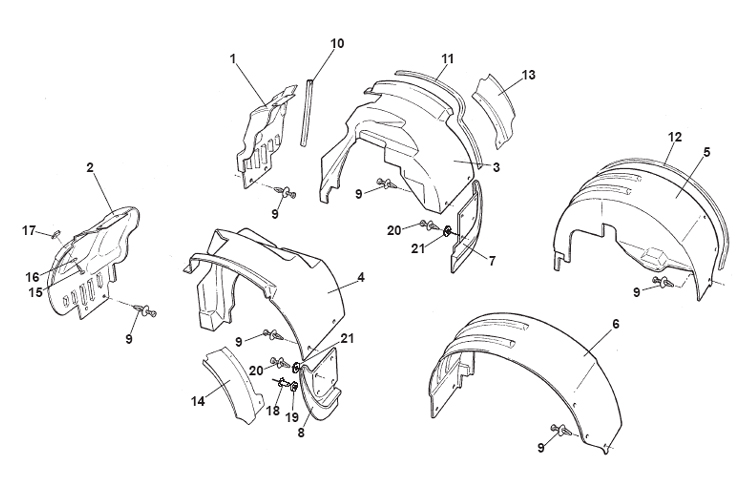
Remove the right front wheel liner. This is difficult and it ends up being a lot of pushing and pulling. The fasteners are hollow buttons with a plastic screw jammed into the middle. This expands the fastener on the other side of the body mounting point. The center part of the fastener needs to be pried out and removed so the button can be pulled out. One of the fasteners, the one at the top of the arch, is a plain cross head screw. Liners numbered one and three need to be removed.
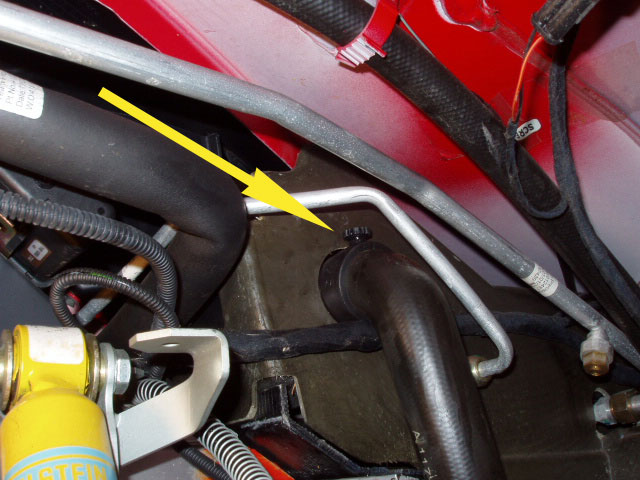
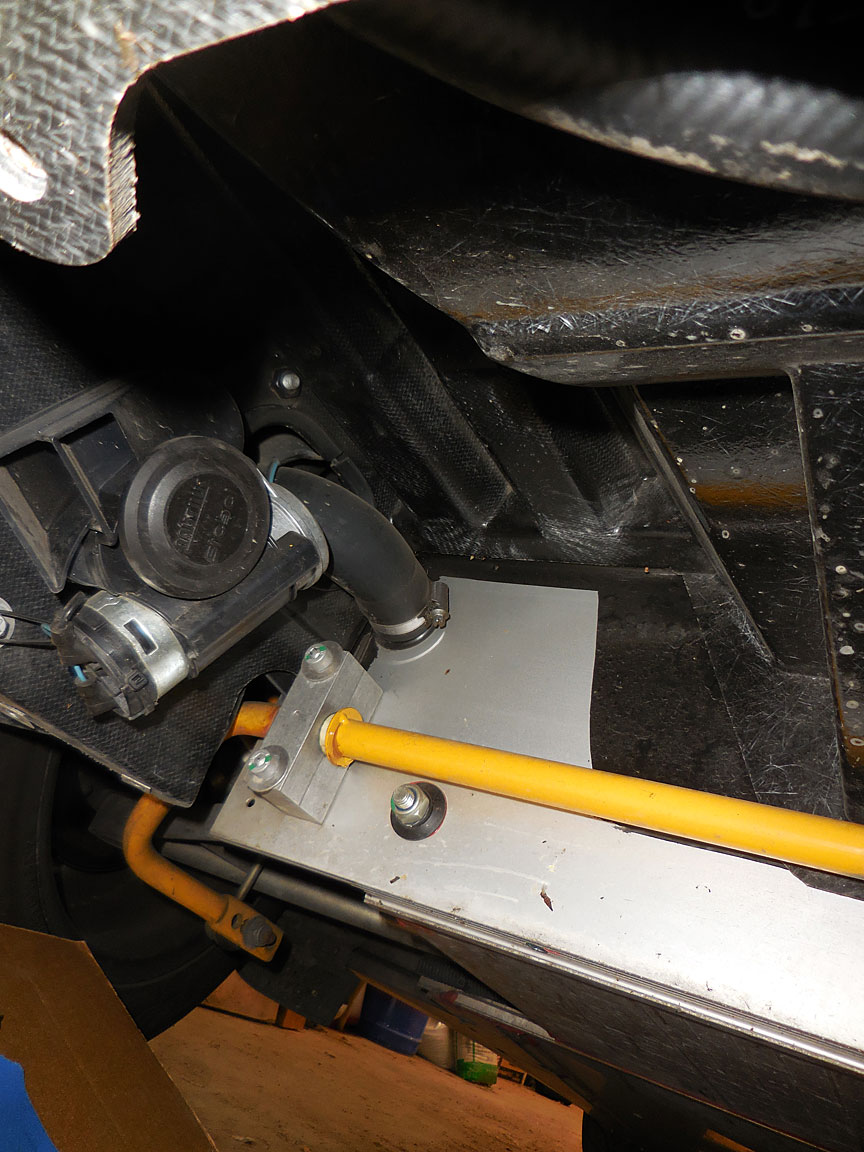
The front bleed screw is shown at the tip of the yellow arrow. It is in the upper front section of the wheel well. Take care not to remove it completely or if you do, capture the O ring. If lost, look for a #47 O-Ring which should have the following dimensions: 11/32" OD x 7/32" ID x 1/16". Start with the bleed screw open.
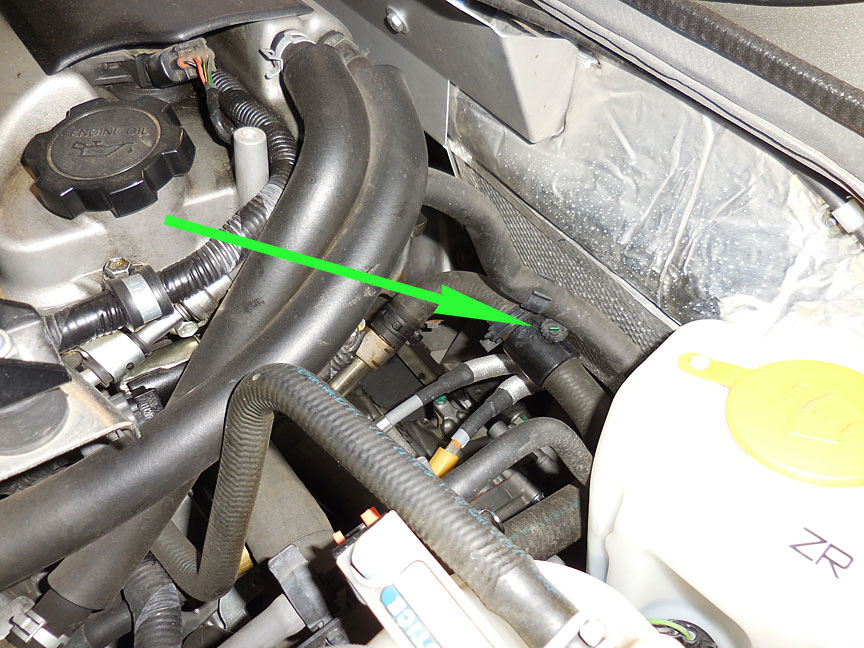
The rear bleed screw is in the engine compartment, to the right and lower than the coolant reservoir. The screw has a knurled knob about 1/2" in diameter. Start with this open as well.
Fill the coolant reservoir. It is important to keep it full and never let it get completely empty. This keeps air from getting into the system and reduces the need to bleed later. You will need to put nine liters into the reservoir, which clearly will require multiple additions. The coolant should drain into the car. Keep filling the reservoir. Occasionally check the two bleed screws to see if any coolant is bubbling out. Once a slow flow of liquid is shown coming out, close the bleed screw. Unfortunatley you will have to open, check, and close these screws multiple times.
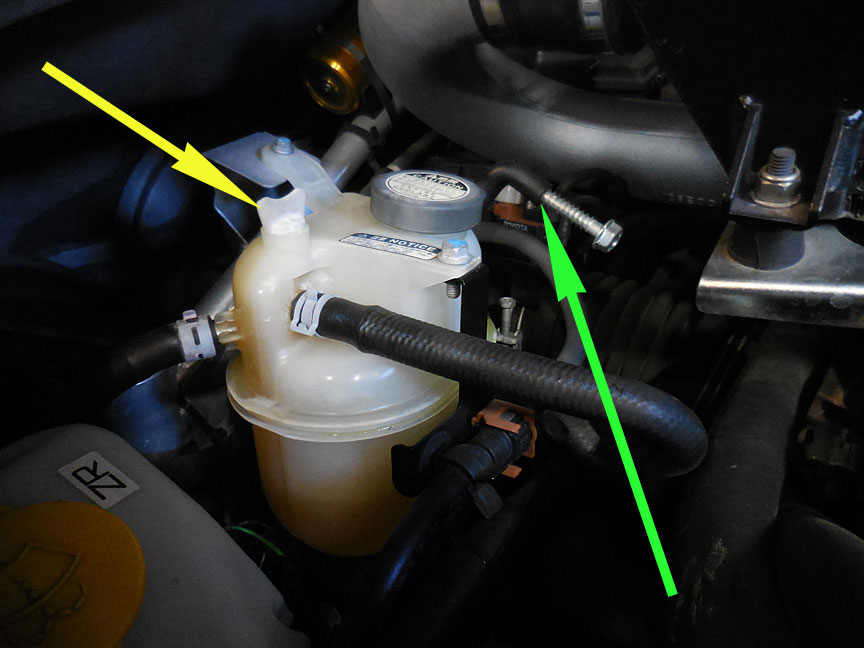
It helps to block the coolant reservoir overflow tube when pouring coolant into the reservoir. Coolant will tend to bypass the interior, depending on the type of funnel you use. The green arrow points to the overflow tube. You can block the tube by inserting a screw or clamping the tube with vicegrips.
The yellow arrow points to the bleed valve on the coolant reservoir. Coolant flows when bypassing the radiator and can potentially collect air bubbles. (More information needed!)
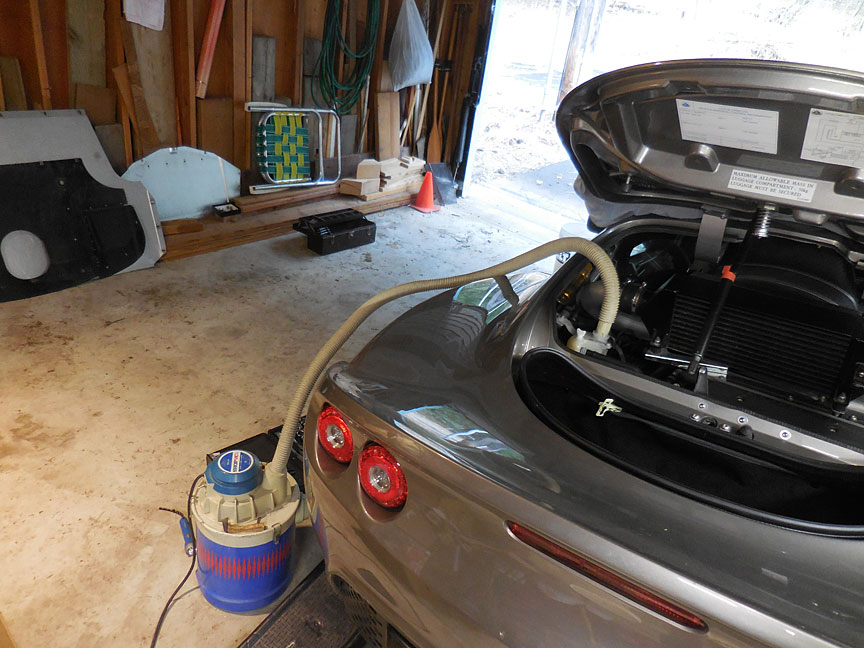
This step is optional. It helps to put pressure into the coolant reservoir. This encourages the coolant to flow into the hoses and pipes. It helps to have a second person to turn the shop vacuum on and off. The pressure will cause the coolant to enter the system, but then when it bubbles at the bleed screws, it splashes. Giving the vacuum short pulses helps move the coolant and minimizes the splashing. I covered the bleed screws with a rag to prevent splashing.
You will hear the coolant as it gurggles into the system, bubbling as it enters various hoses. Eventually, like the step above, you will get coolant flowing out of a bleed screws. At this time, close the screws.
Try to keep the coolant reservoir full. It will drain slowly at times and other times quickly.
Once the system starts to fill completely, you should be able to see fluid flow slowly out of the bleed screw when opened. Close the valve.
Open the front bleed screw. You should see bubbles and the fluid slowly flowing out. Close the front bleed screw.
Once you have filled the reservoir appromimately five times, the system will not take any more coolant. At least not yet. Wishful thinking.
The order here is not critical. What I did was:
- make sure the reservoir is full
- open the front bleed screw until fluid was dribbling out then close
- open the heater bleed screw until fluid was dribbling out then close
Once you have filled the system as much as possible, start the engine and run it at idle. Wait for the cooling fans in the front of the car to turn on. Watch the temperature gauge carefully and do not let it get above a typically hot temperature, usually 206F degrees. Turn off the engine and let it cool. You may hear water boiling inside the engine.
Again, make sure the reservoir is full. Run the engine again until the fans come on and then turn off. Check the bleed screws yet one more time. Make sure the reservoir is close to the full mark.
Drive the car. Once the coolant has reached a normal temperature, usually 186 to 192F, let it cool. The coolant will expand when hot and then contract when cool. This will cause the fluid to fill the coolant reservoir to the full mark and then contract to the low mark. You do some spirited driving, a chore I know, because the high revs will speed the flow of the coolant and the bubbles will collect at the high points or be expressed into the reservoir.
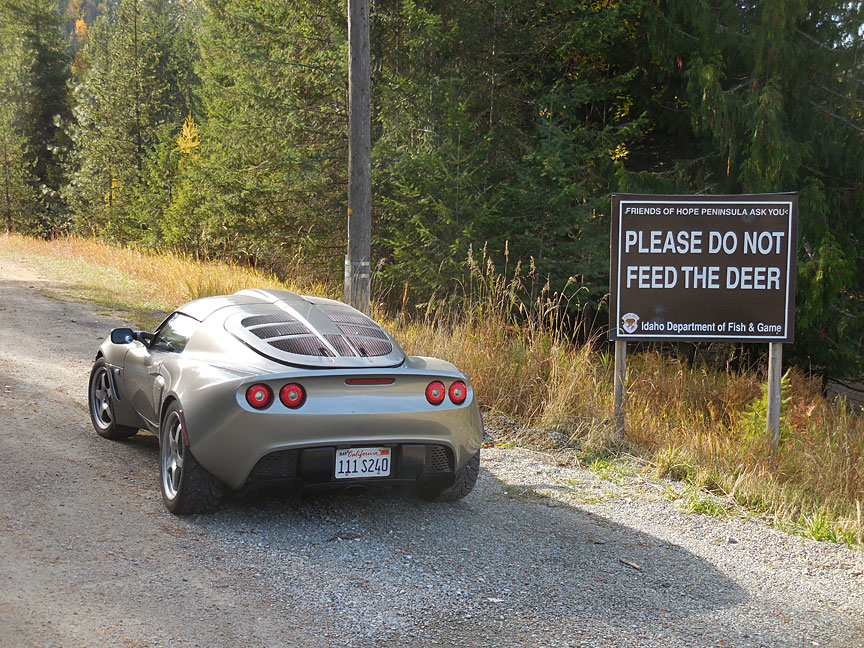
(The deer are so plentiful, literally grazing on our lawns, eating the falling maple leaves, and sleeping everywhere, we call them rodents.)
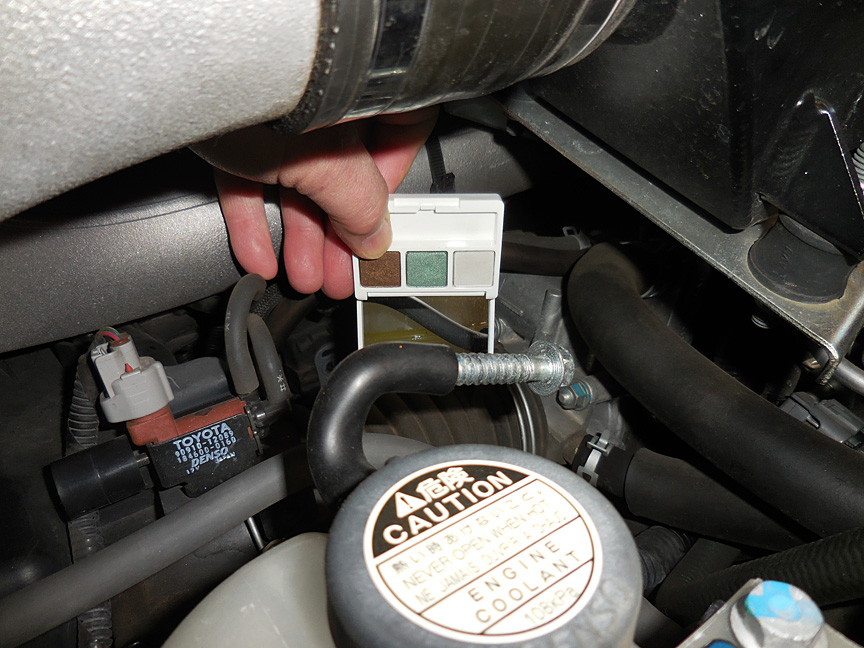
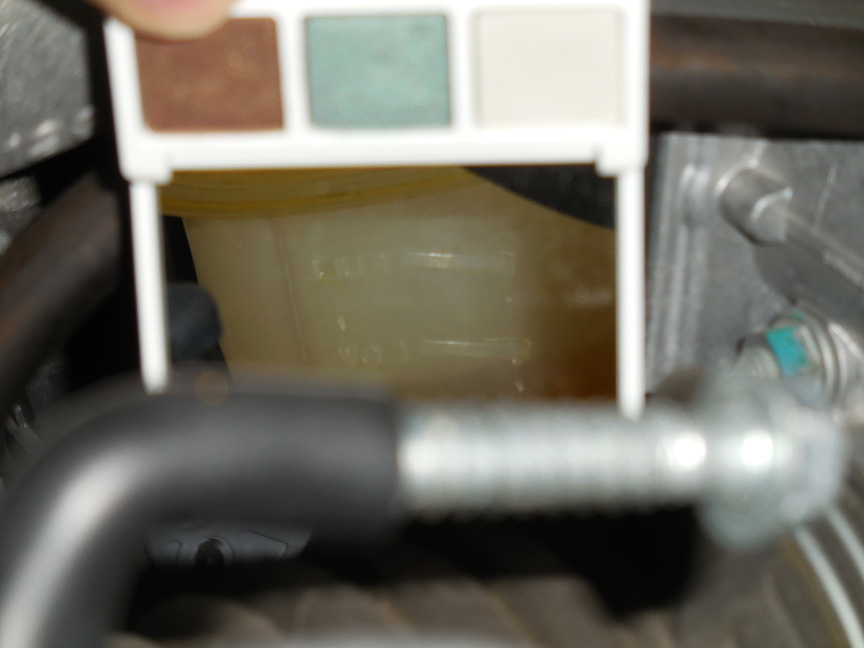
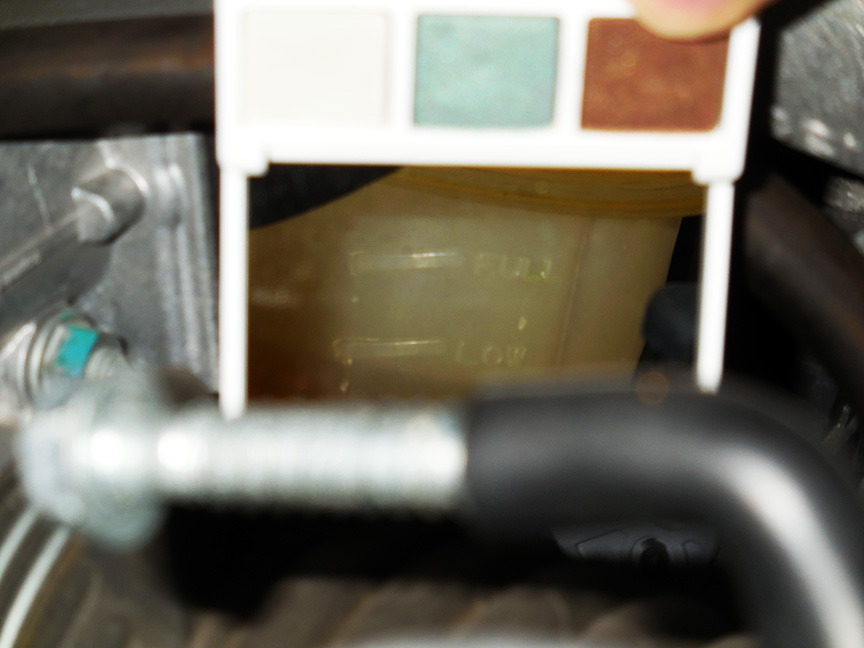
The first picture shows how to use a makeup mirror to see and read the FULL and LOW markings on the reservoir. (A bit of irony as my wife does not like the Exige because it has no rear view mirror inside the car. She can not put on her makeup. So it is ironic that I used one of her mirrors to read the fluid level!)
The second picture shows the FULL and LOW marks on the side of the reservoir towards the front of the car. And the final picture uses the magic of image editing software to reverse the mirror image, allowing you to read the FULL and LOW markings.
Fill the coolant to the proper level. Drive the car and check again. Drive the car and check one more time.
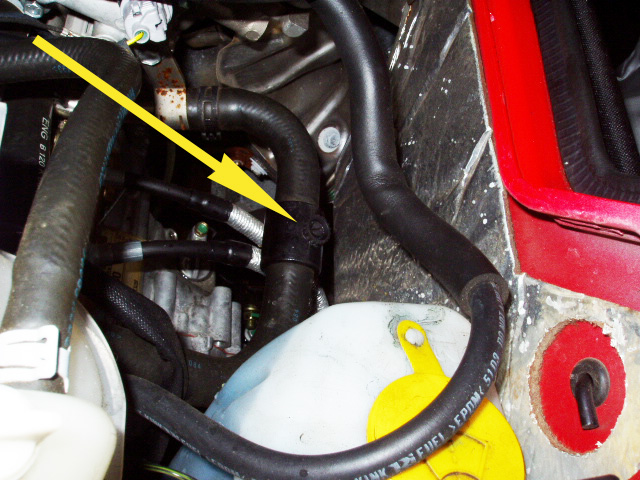
Location of the rear bleeder
Please let me know if these instructions were useful. Most of my tutorials assume a level of mechanical skill and may be difficult for beginners to follow. For the above tutorial I wanted to provide basic information and help people learn the maintenance skills needed to keep their car running. I will provide more tutorials at this level if this one is helpful.
Comments
Unfortunately the draining and refilling instructions are not specific. You can tell when the oil has drained out and the flow has slowed to a drip. The same cannot be said about draining the coolant. Please visit LotusTalk.com for instructions on draining the coolant using other tools. Please let me know if you have any comments on how to make it easier or easier to understand. I would appreciate specifics on the tools needed as I wrote this from memory and mine is not what it used to be.
I wanted to thank tesprit at LotusTalk.com profulsely. He provided much of the basis for this writeup on changing the coolant. He also gave me permission to use some of his images used in his thread. For example, the image of the front bleed valve and the O-ring specification are his.