
Gear Shift Frame Brace
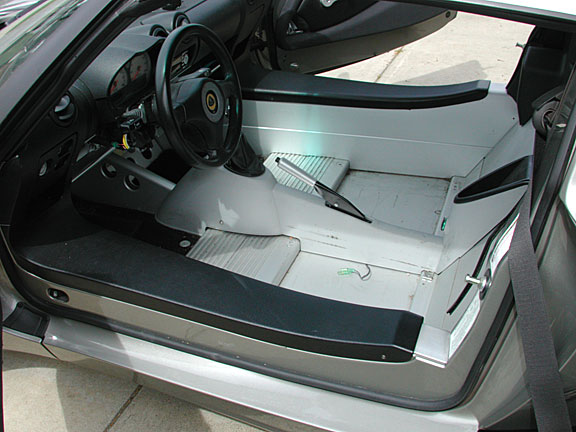
The shift frame or matrix is not well located in the car. The frame wobbles from side-to-side when shifting or applying the emergency brake. The frame is located at the front and back of the frame, just in front of the shift lever and at the rear of the seats.
The fix is relatively easy. There is an unused hole in the middle of the frame, just behind the shift knob. A spacer, filling the gap between the frame and the floor, and a bolt to hold everything in place is all that is needed. The feel of the braced shift lever is surprisingly better, with less flex and a more positive feel while shifting.

2. Note how the shift materix is located. The back of the frame has locating tabs that extend to either side of the frame and are bolted down with the rear seat cap head bolts. There are two bolts at the front of the frame.
3. Note also the holes in the floor, near the center part of the frame.
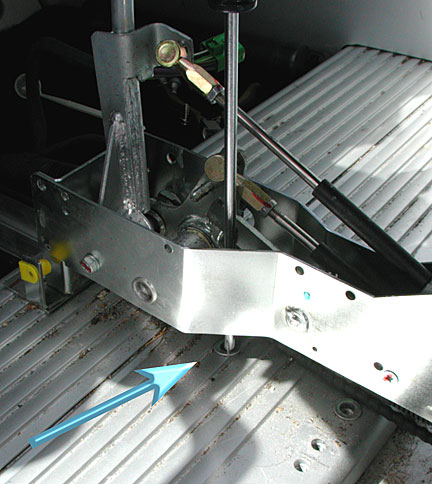
4. Here a screw driver is lowered through the hole in the shift frame and into an unused hole in the floor.
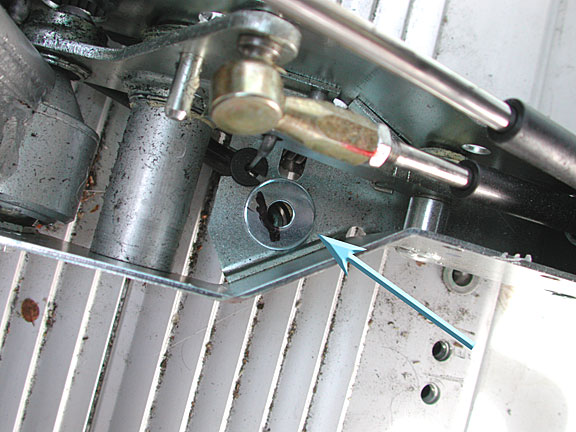
5. Looking from above, you can see the hole. Here a washer has been installed, in anticipation of placing a bolt down through the frame into the hole.
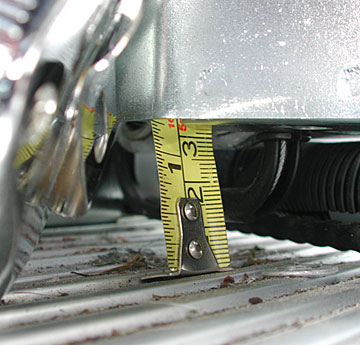
6. Measure the distance from the floor to the shift frame. I could not view the ruler but was able to put my digital camera on the floor and point it in the right direction. My spacer needed to be about 1 1/8 inches long (3 cm). You can shim the spacer with washers if it is too short. The wider the base the better.
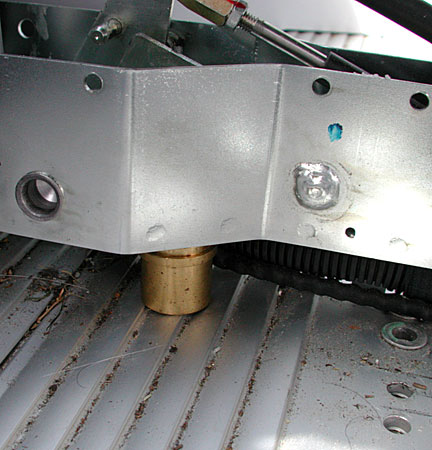
7. I turned a piece of brass to fit. It has a flat top and a wider open at the bottom in order to clear the raised threaded bushing.
8. I used the same size bolt that fits the seats and trimmed it to the correct length. As shown in step 5, a large washer is used to distribute the load on top of the shift frame.
Notes:
- It is also possible to put a series of washers on the bolt to space the frame from the floor.
- Another solution is to put a threaded stud into the hole. A nut can lock it to the threaded insert. Another nut can be placed at the right height on the threaded rod to support the frame and finally a third nut can be used on top of the frame to lock the frame down on the stud.
- The height is not critical as the frame will bend slightly to compensate for differences.
- Loosen the front bolts when installing the spacer to make location and threading of the bolt easier.